Home composting can turn fruit peels, coffee grounds, and autumn leaves into a useful soil amendment, but a pile that is too wet, poorly covered, or filled with the wrong materials can smell, attract pests, and create unnecessary hygiene concerns. This guide explains how to build a manageable system, what to add, what to keep out, and how to tell when compost is ready. It focuses on ordinary household plant scraps and yard materials, not manure processing or commercial-scale composting.
The goal is not to create a perfectly engineered pile. It is to keep organic material aerated, damp rather than soaked, protected from animals, and free of avoidable contaminants. With those basics in place, safe home composting becomes a repeatable low-waste routine rather than another complicated garden project.
Start With Waste Prevention, Then Compost the Rest
Composting is valuable, but it comes after preventing edible food from becoming waste. The U.S. Environmental Protection Agency’s guide to preventing wasted food at home recommends planning meals, checking existing supplies, storing food correctly, and using or freezing leftovers. Those actions preserve the money, water, land, and energy already invested in food.
After edible food has been used, composting is an appropriate next step for many plant-based scraps. The EPA describes composting as managed, aerobic decomposition: microorganisms use carbon, nitrogen, water, and oxygen to transform organic material into a stable soil amendment. “Managed” matters. A heap of wet scraps without enough air is not the same as a maintained compost system.
A practical compost habit begins in the kitchen: prevent edible food waste first, then give unavoidable plant scraps a clean, well-managed route back to the soil.
| Material | Best first action | Compost option |
|---|---|---|
| Edible leftovers | Refrigerate, freeze, or repurpose promptly | Only after the food is no longer suitable to eat |
| Vegetable peels and cores | Use in stock when practical | Add as a nitrogen-rich “green” |
| Dry leaves and small twigs | Store as a carbon supply | Add as “browns” to balance food scraps |
| Food-soiled plastic packaging | Follow local disposal rules | Do not put in a home pile |
Choose a System That Fits Your Space
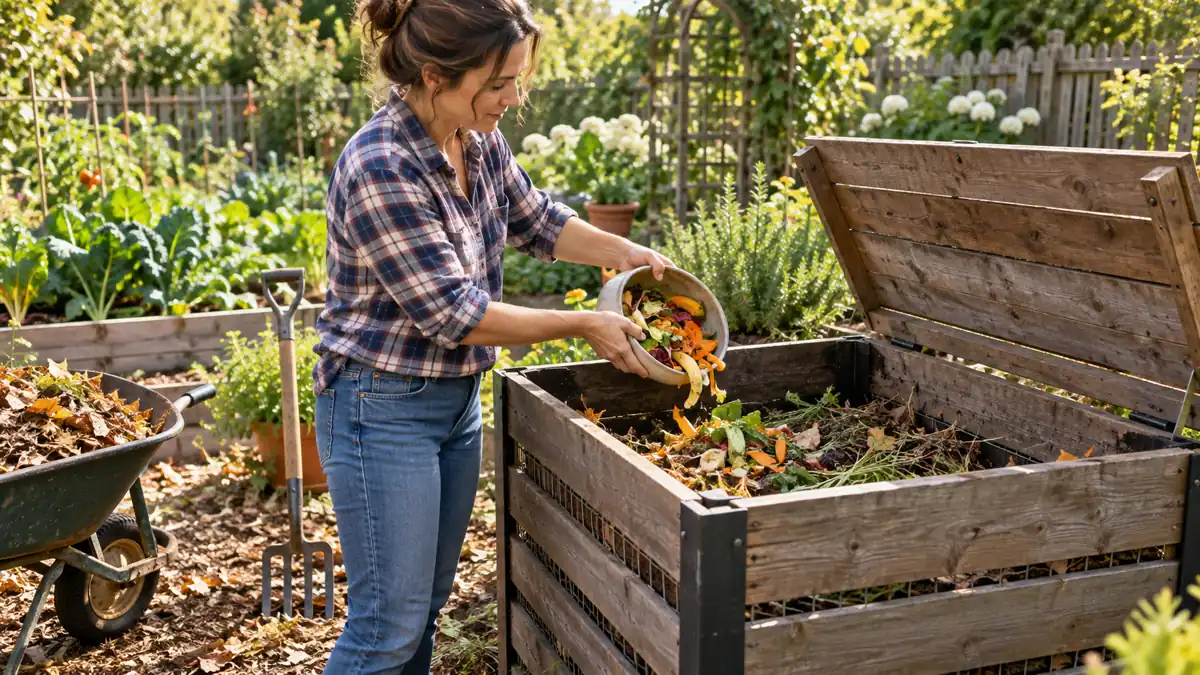
A backyard bin is convenient for households with a steady supply of both kitchen scraps and dry yard material. An enclosed tumbler may be easier where animals are common, although its smaller volume can dry out quickly. Worm composting can work indoors or in a sheltered area when outdoor space is limited. Municipal or community collection is often the simplest choice for apartments and for materials a backyard system should not accept.
The USDA People’s Garden composting guidance presents backyard bins, tumblers, and worm bins as distinct options. Choose based on the material you actually generate, the time you can spend, local weather, and local rules rather than buying equipment first.
| System | Works well for | Main management need |
|---|---|---|
| Enclosed backyard bin | Food scraps plus leaves and garden trimmings | Cover fresh scraps and turn periodically |
| Tumbler | Small yards and areas with animal pressure | Monitor moisture and do not overfill |
| Worm bin | Small amounts of fruit and vegetable scraps | Protect worms from temperature extremes |
| Community collection | Apartments or households lacking browns | Follow the program’s exact acceptance list |
Practical note: Check municipal rules before placing a bin, especially in dense housing. Collection programs and commercial facilities may accept items that a backyard pile cannot process safely.
Know What Belongs in a Backyard Pile
Reliable greens
Fruit and vegetable scraps, coffee grounds with paper filters, crushed eggshells, fresh plant trimmings, and modest amounts of grass clippings are common nitrogen-rich additions. Chop bulky stalks and rinds into smaller pieces so they mix more evenly and are less likely to form wet pockets.
Reliable browns
Dry leaves, small twigs, plant stalks, untreated wood chips, shredded uncoated cardboard, and non-glossy paper provide carbon and structure. Keep a covered reserve of dry browns near the bin. That reserve is the easiest fix for excess moisture, exposed food, or an unpleasant odor.
Materials to keep out
The EPA’s home composting instructions advise excluding meat, fish, bones, dairy products, fats, oils, pet waste, cat litter, treated wood, dryer lint, glossy paper, produce stickers, diseased plants, and persistent weeds. Meat, dairy, and grease can attract animals, while typical backyard piles may not reach the conditions needed to break down risky or difficult materials consistently.
- Remove produce stickers before adding peels or cores.
- Keep pet and human waste out of compost intended for gardens.
- Avoid plants recently treated with herbicides unless the product label clearly permits composting.
- Do not assume an item belongs in the pile because it is marketed as plant-based or biodegradable.
Be Careful With Compostable Packaging
A cup, bag, or fork labeled “compostable” may be designed for an industrial facility, not a home bin. Commercial systems can maintain heat and processing conditions that small household piles generally cannot. The EPA’s compostable-plastics FAQ advises putting plastic in a home pile only when the label specifically says it is suitable for home composting.
When the label is unclear, check the local organics program. Do not put compostable plastic into conventional recycling unless the recycling provider accepts it; it can contaminate that stream. This is one area where local instructions take priority over a general sustainability claim on packaging.
Build the Pile for Air, Moisture, and Coverage
Begin with a loose layer of sticks, wood chips, or other bulky browns so air can enter at the base. Add food scraps in thin layers and cover every addition with dry material. The EPA recommends roughly two to three volumes of browns for each volume of greens and covering scraps with several inches of browns. Treat that ratio as a useful starting point rather than a laboratory formula.
- Set the bin on a well-drained, accessible site near a water source but not pressed directly against a building or fence.
- Add a four- to six-inch base of coarse browns to improve airflow and absorb liquid.
- Mix one container of greens with two or three containers of browns.
- Bury new kitchen scraps in the center and cover them completely.
- Add water only when the mixture feels drier than a wrung-out sponge.
- Turn or mix periodically so compacted areas receive oxygen.
Safety note: Do not use smell alone to judge hygiene. Keep hands away from the face while working, wash hands afterward, and keep children and pets from eating or playing in compost.
Use Simple Signals to Keep the Pile Balanced
A home pile gives useful feedback. A sour or rotten odor often indicates too much moisture or too little air. Visible food and flies point to inadequate coverage. A pile that never changes may be too dry, too small, or short of greens. The peer-reviewed Oregon State University Extension guide to composting systems recommends adding dry browns and turning a wet, smelly pile, burying exposed food, and using a more secure bin when rodents are a concern.
| What you notice | Likely cause | First adjustment |
|---|---|---|
| Rotten or sour odor | Too wet or oxygen-poor | Add dry browns and turn gently |
| Flies around fresh scraps | Food left exposed | Bury scraps and add a thick brown cover |
| Rodent activity | Attractive feedstocks or gaps | Remove risky foods and secure openings |
| Pile is dry and unchanged | Too little moisture | Add a small amount of water while mixing |
| Pile is soggy | Too much water or poor drainage | Add browns, turn, and protect from rain |
Treat Home Compost as a Hygiene Task
Compost is biologically active, and backyard piles do not behave like regulated commercial systems. A Cornell University project archived by the USDA National Institute of Food and Agriculture found potentially pathogenic bacteria in sampled small-scale composts and recommended ordinary hygiene such as handwashing after handling. The project also noted that many small piles fail to reach pathogen-reducing temperatures consistently.
Wear gardening gloves when handling decomposing material, especially if you have cuts. Wash hands with soap and water afterward. Avoid creating airborne dust when turning a dry pile; moisten it lightly first. People with significant mold allergies, weakened immune systems, or respiratory conditions should ask a clinician whether direct compost handling is appropriate for them and may prefer sealed municipal collection.
Seek local professional guidance if a pile contains pet waste, human waste, unknown chemicals, large amounts of moldy material, or animal carcasses. A routine backyard guide cannot make those inputs safe.
Know When Compost Is Finished
Finished compost should be dark, crumbly, and earthy-smelling, with few recognizable feedstocks. It should no longer heat up after mixing. The EPA suggests allowing compost to cure after active heating has stopped; this resting period supports stability before use. Screen out sticks, fruit pits, stickers, or other pieces that did not break down, and return suitable woody pieces to the active pile.
Do not treat a single temperature reading as proof that every part of a home pile is pathogen-free. Small systems heat unevenly, and their cooler edges may not reach the same temperature as the center. Mature appearance, stable temperature, appropriate feedstocks, adequate curing, and hygienic handling are more practical household safeguards than chasing a commercial composting standard.
Use Finished Compost Conservatively
Blend mature compost into garden soil, apply a thin layer around established plants, or use it as part of a potting mix rather than planting directly into pure compost. If the material still smells sour, reheats after turning, or contains obvious food scraps, return it to the active pile. Keep unfinished compost away from seedlings, edible harvest surfaces, and indoor living spaces.
The EPA overview of composting and its benefits explains that stable compost can add organic matter, improve soil water retention, reduce erosion, and return nutrients to soil. These are soil-management benefits, not a guarantee that compost will replace every fertilizer or correct every garden problem. A soil test can guide amendments when plant growth is poor.
A Seven-Day Setup Plan
A small, staged start makes the habit easier to maintain:
- Day 1: Track which plant scraps and dry yard materials your household generates.
- Day 2: Check local compost rules and choose a bin or collection option.
- Day 3: Set aside a lidded kitchen container and a dry-brown storage area.
- Day 4: Build the coarse base and add the first mixed layer.
- Day 5: Check that all food scraps are fully covered.
- Day 6: Test moisture by squeezing a handful with gloves; it should feel like a wrung-out sponge, not drip.
- Day 7: Record one maintenance cue, such as turning weekly and adding browns after every kitchen deposit.
After that, observe rather than overmanage. Cover additions, adjust moisture, and troubleshoot early. A modest pile that stays contained and balanced is more useful than a large system that becomes difficult to maintain.
Bottom Line
Safe home composting rests on a few repeatable decisions: prevent edible food waste first, select a system that fits your space, combine plant-based greens with plenty of dry browns, keep risky materials out, cover fresh scraps, maintain airflow and moderate moisture, and practice good hand hygiene. When your household cannot manage those conditions, a municipal or community program is a responsible alternative.
The most sustainable system is the one you can operate consistently without odors, pests, contamination, or guesswork. Start small, follow local acceptance rules, and let the pile’s moisture, smell, and structure guide simple corrections.
Sources
- U.S. Environmental Protection Agency: Composting at Home
- U.S. Environmental Protection Agency: Composting
- U.S. Environmental Protection Agency: Preventing Wasted Food at Home
- U.S. Environmental Protection Agency: Plastic Recycling and Composting FAQ
- U.S. Department of Agriculture: Composting
- USDA National Institute of Food and Agriculture: Pathogens in Home Composting
- Oregon State University Extension: Choosing and Using a Composting System